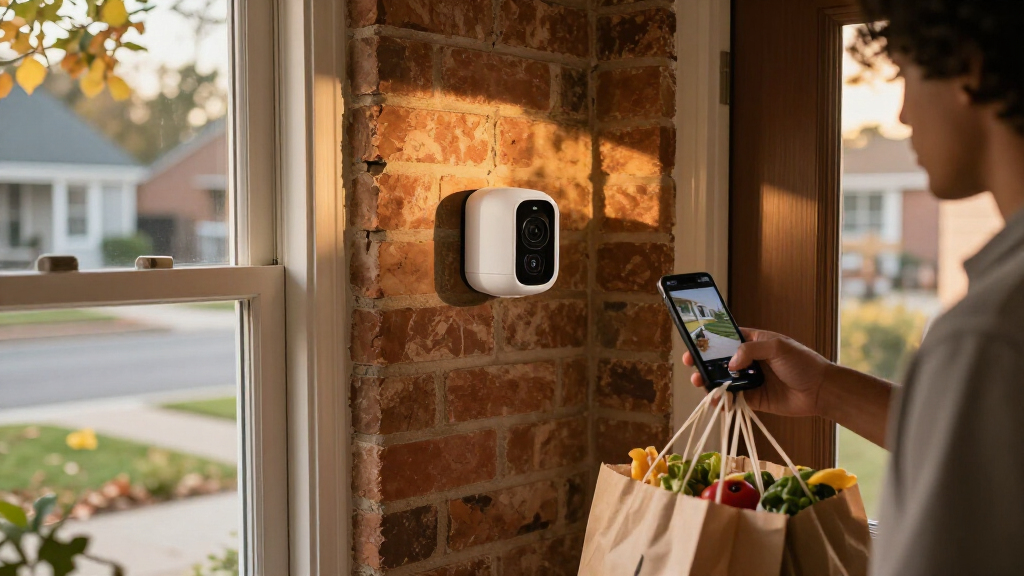
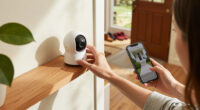
Set up smart home security cameras by choosing useful locations, mounting each camera, connecting it to your network, and checking its live view, recording, and alerts. This guide is for homeowners and renters who can use a smartphone app and perform basic mounting; no security-system experience is needed. Allow 1–3 hours for a small setup, with extra time if you need to route cables or improve Wi-Fi coverage.

Get home appliances delivered free with Prime
- Fast, free delivery on millions of items
- Prime Video, Amazon Music and more included
- Member-only deals all year

Reolink 8-Channel 4K Security Camera System with PT Auto-Tracking
- ✔ Included cameras: 4 PoE cameras
- ✔ Video resolution: 8MP (3840 × 2160)
- ✔ NVR channels: 8

Hiseeu 12MP PoE Security Camera System with 8 Cameras
- ✔ Included cameras: 8 PoE cameras
- ✔ NVR channels: 16
- ✔ Video resolution: 12MP

Blink Outdoor 4 Wireless Security Camera System, 5 Cameras with Sync Module Core
- ✔ Included cameras: 5 Outdoor 4 cameras
- ✔ Video resolution: 1080p HD
- ✔ Field of view: 143° diagonal
Difficulty: Beginner | Time: 1–3 hours
What You’ll Need
Tools & Materials:
- Smartphone or tablet with the camera maker’s app
- Camera, power adapter, mounting plate, and supplied screws
- Wi-Fi network name and password
- Drill and screwdriver for fixed mounts
- Tape measure and pencil
- Ladder for high mounting points
Knowledge:
- Basic smartphone app use
- How to connect a device to home Wi-Fi
- Basic drilling and screw use if installing a fixed mount
Check the camera’s instructions for supported Wi-Fi bands, power needs, weather rating, and storage options. Many cameras require 2.4 GHz Wi-Fi during setup. Get permission before drilling in a rental, and check local rules and household expectations before recording shared spaces.
Reolink 8-Channel 4K Security Camera System with PT Auto-Tracking
For a homeowner who wants a connected security system with robust recording, Reolink is the most complete choice in this group. Its four PoE cameras capture 4K video and can pan 355 degrees and tilt 50 degrees, while automatic tracking helps follow movement across a monitored area. Person, vehicle and animal detection adds useful filtering, and two-way talk gives us a way to respond without being at the camera.Compared with Hiseeu, Reolink includes fewer cameras and has a lower stated resolution, but it offers pan-and-tilt tracking that the Hiseeu listing does not describe. It also stands apart from Blink by recording continuously to an included 2TB hard drive, with expansion possible up to 16TB. That makes it better suited to buyers who want footage available locally without cloud storage being the center of the setup.The main cost of that capability is installation effort: each camera needs a wired PoE connection, so placement depends on cable runs and the NVR setup. The included drive is also smaller than its maximum expansion capacity, which matters if we plan to keep extensive continuous footage. Reolink is our top pick when image detail, active coverage and local recording matter more than a quick, wire-free installation.
Pros:
- 4K video with color and infrared night vision
- Automatic pan-and-tilt tracking with preset points
- Person, vehicle and animal detection plus two-way talk
- Included 2TB drive supports continuous recording and expansion
Cons:
- Every camera requires a wired PoE connection
- Included storage is 2TB, below the system’s 16TB expansion maximum
Best for: Homeowners who can run Ethernet and want 4K footage, camera tracking and continuous local recording.
Not ideal for: Renters or anyone who needs a fast wireless installation with minimal cabling.
Bottom line: Choose Reolink for the strongest balance of detailed footage, active camera coverage and local recording, provided Ethernet installation suits the property.
“Choose Reolink for the strongest balance of detailed footage, active camera coverage and local recording, provided Ethernet installation suits the property.”
Hiseeu 12MP PoE Security Camera System with 8 Cameras
When covering more doors, sides of a home or outbuildings is the priority, Hiseeu puts eight cameras in the box and pairs them with a 16-channel NVR. That is twice the included camera count of Reolink and three more than Blink, making it the most ready-made option for buyers who want broad coverage from the outset. The 121-degree viewing angle and 2.8mm wide-angle lens are intended to cover more of each scene, while human and vehicle detection, app alerts and two-way audio address common monitoring needs.Hiseeu also has the highest stated capture resolution in this comparison at 12MP, along with color night vision and spotlight alarm modes. Yet more pixels and cameras do not automatically make it the most flexible pick: unlike Reolink, the supplied description does not specify pan-and-tilt tracking or animal detection. Its PoE wiring also means eight camera positions need to be planned, and expanding beyond the included cameras requires a PoE switch that is not included.There is one notable listing ambiguity to resolve before relying on storage capacity: the description says the drive is 4TB, while the specifications say 3TB. Since storage determines how much recorded footage we can retain, we would verify the included capacity with the seller. Choose Hiseeu when the wider initial camera layout matters more than tracking features or a fully consistent specification sheet.
Pros:
- Eight cameras and a 16-channel NVR are included
- 12MP capture with a 121° viewing angle
- Human and vehicle detection with app alerts
- Two-way audio and multiple night vision modes
Cons:
- The listing conflicts on whether the included HDD is 3TB or 4TB
- Wired PoE installation requires Ethernet at each camera
- Expansion beyond eight cameras requires a separately supplied PoE switch
Best for: Owners of larger homes or properties who want eight wired cameras and a multi-channel NVR included.
Not ideal for: Buyers who need wireless placement, automatic camera tracking or a clearly confirmed hard-drive capacity.
Bottom line: Hiseeu is the coverage-first option for a property that needs eight wired viewpoints, but confirm its storage capacity before choosing it over Reolink.
“Hiseeu is the coverage-first option for a property that needs eight wired viewpoints, but confirm its storage capacity before choosing it over Reolink.”
Blink Outdoor 4 Wireless Security Camera System, 5 Cameras with Sync Module Core
Blink Outdoor 4 is the clear choice when avoiding camera cables matters more than recording detail or a self-contained local archive. Five compact battery-powered cameras can be placed around a home without running PoE lines, and the included batteries are rated for up to two years under default settings. That flexibility makes Blink easier to accommodate in a rental or a finished home where routing Ethernet would be disruptive.Against Reolink and Hiseeu, Blink trades wired infrastructure and hard-drive recording for simpler placement. Its 1080p live view and infrared night vision cover everyday monitoring, while two-way audio and enhanced motion detection add useful alerts and interaction. The 143-degree diagonal field of view can help when positioning a camera to watch a broad entrance, though it does not provide the 4K detail of Reolink or the 12MP capture claimed for Hiseeu.The bigger limitation is the recording model. Sync Module Core does not support local storage, cloud storage beyond the trial requires a subscription, and person detection also needs an optional plan. Battery life depends on default settings and can vary with activity and configuration. Blink makes the most sense when installation convenience is the deciding factor; buyers who want continuous local footage should choose one of the wired NVR systems instead.
Pros:
- Five wireless cameras support flexible placement
- 1080p live view with infrared night vision
- Two-way audio and enhanced motion detection
- Batteries are rated for up to two years under default settings
Cons:
- Sync Module Core does not support local storage
- Cloud storage beyond the trial requires a subscription
- Person detection requires an optional subscription plan
Best for: Renters and households wanting several battery-powered cameras that are easy to place without Ethernet runs.
Not ideal for: People who need local storage, continuous recording, 4K detail or person detection without an optional subscription.
Bottom line: Pick Blink for cable-free placement and straightforward coverage, as long as subscription-dependent recording and 1080p resolution fit your needs.
“Pick Blink for cable-free placement and straightforward coverage, as long as subscription-dependent recording and 1080p resolution fit your needs.”
As an Amazon Associate we earn from qualifying purchases.
Before You Start
Protect privacy and avoid unsafe installation. Aim cameras at your own entrances and property. Avoid recording neighbors’ windows or private areas, and tell household members where cameras are placed. Do not mount a camera where it could fall onto a walkway or where you must lean dangerously from a ladder. Switch off power before working near existing electrical wiring; use the supplied low-voltage adapter rather than altering wiring.
Charge battery cameras before mounting. For wired models, identify a nearby outlet and test the camera there first. Keep the app open during pairing, and have your Wi-Fi password ready.
Step-by-Step Instructions
Step 1: Choose the areas to monitor
Walk around your home and list the areas you need to see, such as the front door, driveway, back entrance, or a main indoor entryway. Choose a camera for each area based on its field of view, night vision, weather rating, and power source. Avoid aiming a camera directly into bright sunlight or at a moving tree that may trigger repeated alerts.
Tip: Cover entry points and likely approach paths before adding cameras to low-priority areas.
Check: You have a short location list and know which camera model and power source suit each spot.
Step 2: Check Wi-Fi and power at each location
Stand where you plan to place each camera and check the Wi-Fi signal with your phone. If the signal is weak, move the camera closer to the router, reposition the router, or consider a compatible mesh node. Confirm that a wired camera can reach an outlet without a cable crossing a path or being pinched by a door.
Tip: A phone showing Wi-Fi bars is only a rough guide. Test the camera in the intended spot before drilling.
Check: The camera stays connected during a temporary placement, and its power cable or battery plan is workable.
Step 3: Install the camera app and account
Download the camera maker’s official app, create an account, and follow its security prompts. Use a unique password and turn on two-step verification if available. Review who has access to the account and remove any shared users who no longer need it.
Tip: Avoid reusing your email password for the camera account.
Check: You can sign in, see the device setup option, and have account recovery details available.
Step 4: Pair each camera with the app
Power on one camera at a time and select the app’s add-device option. Scan its setup code or enter the requested device details, then connect it to the correct Wi-Fi network. Follow any prompts to update its software before mounting. Name it for its location, such as “Front Door,” so alerts are easy to identify.
Tip: If setup fails, check that your phone is on the required Wi-Fi band and that the password has no typing errors.
Check: The app lists the camera by its location name and displays a live image.
Step 5: Test the view before mounting
Hold or temporarily place the camera at the planned height and angle. Use the live view to check that faces and approach paths are visible, while private areas remain outside the frame. Walk through the monitored area and check the image during daylight and, if possible, after dark.
Tip: Do not aim only at the ground or the top of a person’s head. A modest downward angle often captures useful detail near an entrance.
Check: The view includes the area you want to monitor without showing spaces you intend to keep private.
Step 6: Mount the camera securely
Mark the mounting holes, then use the supplied anchors and screws for the wall material. Attach the mounting plate, secure the camera, and adjust its angle. For an outdoor camera, follow the maker’s instructions for weather exposure and cable placement. Keep any power connection sheltered as specified by the manufacturer.
Tip: Check for hidden pipes or wires before drilling. Use a stable ladder on level ground and have another person steady it when needed.
Check: The camera does not wobble when lightly touched, and the app still shows the intended view.
Step 7: Set recording, privacy, and alerts
In the app, choose whether the camera records continuously or only when motion is detected, then select local or cloud storage if offered. Set motion zones to cover the target area and reduce activity from roads, sidewalks, or trees. Choose alert sensitivity, quiet hours, and notification preferences. Turn on privacy shutters or privacy zones when supported.
Tip: Start with moderate motion sensitivity. Very high sensitivity can produce frequent alerts from harmless movement.
Check: Recording and notifications are enabled as intended, and the camera ignores areas outside your monitoring plan.
Step 8: Verify recording and alerts
Walk through the camera’s view and wait for a notification. Open the event or recording history and play the clip. Check that the timestamp is correct, the picture is clear, and the clip includes the event from beginning to end. Repeat for each camera, then check the live view again after final mounting.
Tip: Some services take a short time to process an event. Check the app’s stated delay before changing settings.
Check: Each camera provides a usable live view, saves a test event, and sends the expected alert.
Common Mistakes to Avoid
- Mounting before testing Wi-Fi or framing. — Pair the camera and check its live view from the planned position before drilling.
- Pointing the camera toward a neighbor’s property or a private area. — Review the full image in the app, adjust the angle, and use privacy zones when available.
- Setting motion sensitivity too high. — Begin at a moderate level, draw motion zones around relevant paths, and tune settings after reviewing test events.
- Leaving a camera account protected by a reused password. — Use a unique password, enable two-step verification when offered, and review account sharing.
Troubleshooting
Problem: The camera will not join Wi-Fi.
Solution: Move it near the router, verify the network password, and check the manual for supported Wi-Fi bands. Restart the camera and phone, then retry setup. If pairing still fails, reset the camera according to its instructions.
Problem: The live image freezes or drops out.
Solution: Test the signal at the camera location, reduce distance or obstructions, and restart the router and camera. Check for an app or camera software update. Reposition the router or add a compatible mesh node if the signal remains weak.
Problem: Motion alerts arrive too often.
Solution: Narrow the motion zone, lower sensitivity, and disable alerts for activity that does not matter. Check whether shadows, branches, or passing traffic are moving through the frame.
Problem: A motion event appears, but no recording plays.
Solution: Check that recording is enabled and that storage is available or the subscription is active. Confirm the camera’s date and time, then trigger another test event and inspect the recording history.
What Success Looks Like
The setup is complete when each camera stays connected, shows the intended area in live view, records a test event, and sends the alert settings you selected. Images should be clear enough to identify activity at the monitored entrance, the timestamp should be accurate, and privacy zones should exclude areas you do not intend to record.
Next Steps
Review camera views and account access once a month, and check recordings after app or router changes. Clean outdoor lenses with a soft cloth, recharge batteries when prompted, and replace batteries before they run empty. Recheck alerts after seasonal changes, since foliage, daylight, or snow can affect motion detection. Save the manufacturer’s reset and support instructions in a place household members can find.
Frequently Asked Questions
Where should I place a security camera?
Start with entrances and approach paths you want to monitor. Mount the camera where it can capture useful detail without pointing into neighbors’ private spaces. Test the image before fixing the mount in place.
Do smart cameras need Wi-Fi?
Most smart cameras need Wi-Fi for app setup, alerts, and remote viewing. Some models can save footage locally during an internet outage, but features vary. Check the model’s instructions for its offline behavior.
Should I choose cloud or local recording?
Compare storage cost, recording history, access controls, and what happens if the camera or internet connection is unavailable. Cloud plans may require a subscription; local storage may require a memory card or base station and can be lost if that device is damaged.
How can I reduce false alerts?
Set motion zones around the area that matters, lower sensitivity, and avoid aiming at branches or busy roads. Test the settings by walking through the monitored area and reviewing the resulting clips.
Fall Picks
fall essentials
As an affiliate, we earn on qualifying purchases.