Keeping your Vitamix Ascent X5 in top condition ensures optimal performance and longevity. Regular cleaning prevents buildup and maintains the quality of your blends. This guide provides practical, step-by-step instructions to clean your blender safely and effectively.
Follow these steps to keep your Vitamix clean without damaging its components, especially the blades and container.
Key Takeaways
| Self-Cleaning Feature | Use the built-in self-cleaning program for quick maintenance. |
| Manual Cleaning | Disassemble and wash removable parts with warm soapy water. |
| Blade Care | Inspect blades regularly and replace with compatible wet blade assembly if needed. |
| Avoid Harsh Chemicals | Use gentle cleaning agents to prevent damage to the container and blades. |

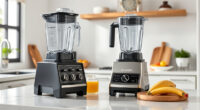
Vitamix Ascent X3 Blender with Three Blending Programs, Self-Cleaning Program, Professional-Grade Blender for Smoothies, Soups and More, Stainless-Steel Blades, 48 Oz Container, Shadow Black
Included: Ascent X3 blender motor base, 48-ounce container, S2 low-profile tamper, tamper holder, and digital recipe book; this...
As an affiliate, we earn on qualifying purchases.
Preparing Your Blender for Cleaning
- Unplug the Vitamix Ascent X5 from the power outlet to ensure safety during cleaning.
- Remove the container from the motor base by twisting it counterclockwise.
- Take out the tamper and any other removable accessories.
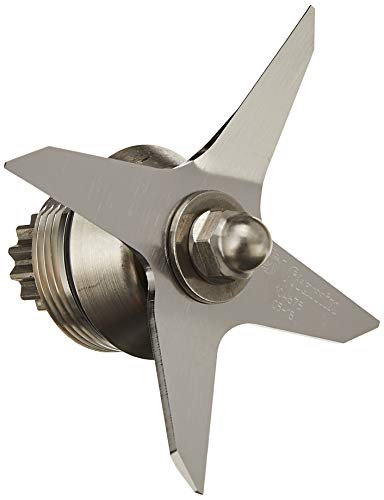
Vitamix Wet Blade Assembly, Silver
The Wet Blade Assembly is designed to be used with the 64-, 48-, and 32-ounce Standard Containers.
As an affiliate, we earn on qualifying purchases.
Using the Self-Cleaning Program
- Fill the container halfway with warm water.
- Add a drop of dish soap.
- Secure the lid tightly.
- Select the Self-Cleaning Program using the digital controls and run it. The cycle lasts about 60 seconds.
Manual Cleaning of Components
- Wash the container, lid, and tamper with warm, soapy water. Use a soft sponge or brush to scrub away residue.
- Rinse thoroughly with clean water and dry with a soft towel.
- Inspect the blades periodically for any buildup or damage.
Cleaning the Blades and Replacing the Wet Blade Assembly
If blades are dull or damaged, consider replacing with a compatible wet blade assembly designed for older models. Always ensure the blades are securely installed before use.
Tips and Warnings for Safe Maintenance
- Avoid using abrasive cleaners or steel wool, which can damage the container or blades.
- Ensure the blender is unplugged before disassembly or cleaning.
- Do not immerse the motor base in water or any liquid.
The Products in This Guide

Vitamix Ascent X3 Blender
- ✔ Container Size: 48 oz
- ✔ Blade Material: Stainless steel
- ✔ Programs: Three automatic + Pulse

Vitamix Wet Blade Assembly
- ✔ Blade Diameter: 4 inches
- ✔ Material: Stainless steel
- ✔ Compatibility: Older containers
Vitamix Ascent X3 Blender
The Vitamix Ascent X3 Blender offers a self-cleaning feature that simplifies daily maintenance. Regular cleaning of the container and blades ensures optimal blending performance and longevity.
Pros:
- Self-cleaning program saves time
- Durable stainless-steel blades
- Easy-to-use digital controls
- Includes tamper and recipe book
Cons:
- Container may stain if not cleaned promptly
- Blade assembly requires replacement if damaged
- Limited to specific container sizes
Best for: Regular home use, smoothies, soups, and desserts
Not ideal for: Heavy-duty commercial environments
Bottom line: Regular cleaning with the self-cleaning program and manual maintenance keeps your Vitamix performing at its best.
Vitamix Wet Blade Assembly
If you notice dull blades or experience blending issues, replacing with a Vitamix Wet Blade Assembly can restore your blender’s efficiency. Designed for older containers, it offers durability and quiet operation.
Pros:
- Hardened stainless-steel blades
- Easy to replace
- Increases lifespan of blades
- Handles ice and purées easily
Cons:
- Not compatible with newer containers
- Installation requires some disassembly
- Limited to specific container sizes
Best for: Replacing worn blades or upgrading older units
Not ideal for: Newer Vitamix models or containers
Bottom line: A durable and reliable replacement blade assembly for older Vitamix containers.
Frequently Asked Questions
Can I put my Vitamix container in the dishwasher?
Yes, the container, lid, and tamper are dishwasher safe. However, hand washing is recommended to prolong their life.
How often should I clean my Vitamix?
It’s best to run the self-cleaning program after every few uses, and manually wash the container weekly or as needed.
What should I do if my blades become dull?
Replace the blades with a compatible wet blade assembly designed for your model to restore performance.
Is the motor base water-resistant?
No, the motor base should never be submerged in water. Keep it dry and clean with a damp cloth.
Keep Your Vitamix Performing at Its Best
Regular cleaning and maintenance are essential for ensuring your Vitamix Ascent X5 continues to deliver smooth, consistent results. Use the self-cleaning feature for quick upkeep and manually clean parts as needed. Replacing blades when necessary keeps your blender functioning optimally for years to come.
Affiliate disclosure: As an Amazon Associate we earn from qualifying purchases. Prices and availability are accurate as of the time of publishing.